Installing your wood bar rail does not have to be complicated, especially if you have a guide to follow. Keep in mind some of how you install it will depend on the style you choose. Most of the examples and tips you will find online are based on the Chicago style bar rail.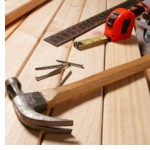
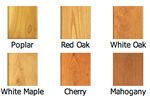
Choosing your bar rail is one of the important tasks you need to consider before getting to the installation. Aside from wood choices, and even the style of the end, you will need to think about functionality.
Think about how much use your bar is going to get. Some people simply want a bar for occasional personal use and others want this to be the nightly hang out spot for friends and family. Also, whether or not you and your guests will be eating at the bar is something to consider. If you choose a bar rail with a lip at the point where it joins the bar top it helps prevent spills but it is not usually as comfortable as an arm rest.
Think about how you want to end result to look and feel, as well as how comfortable it should be for visitors. This is all part of the important process of choosing your bar rail before you even get to the installation part.
In addition to a well planned out guide, you can consider following some handy tips as well. The most important thing to remember, of course, is to always wear protective eyewear.
Here are some other things to keep in mind when installing your wood bar rail:
Make sure you have the tools required for your project ahead of time. The obvious ones are your drill, glue, and screws. Do not wait until the moment you are installing your rail to realize you need more items.
For the Chicago style bar rail, the most popular style, the sub top needs to extend past the main bar top by 1 9/16”.
Once you have all your pieces cut, make sure at that point that they are going to fit together as needed instead of waiting until you are trying to fix them permanently into place.
From there it is time to drill pilot holes into an area every 12 inches on the sub top. If you would like, you can also add a biscuit joint to your rail for added strength.
When brushing on your glue, be sure to apply glue to the sub top as well as the top notch of the bar rail. This will help ensure a tighter and closer fit.
You need clamps and blocking to hold the glued pieces in place until they dry completely.
The final step is to screw the bar rail to the rail top. You do this by using your drill and screwing underneath in the pilot holes. This makes it secure as well as being unable to be seen.
You can never have too much information when it comes to tackling a DIY project like installing a wood bar rail. Here are some additional tips for installing a wooden bar rail.